home decor
Showing posts with label home decor. Show all posts

Eclectic modern Office Space

Monday, May 9, 2022

No comments
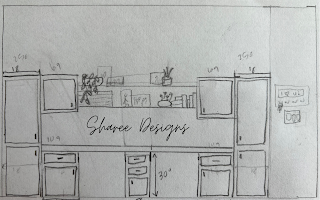
Have you heard?? I’m working on one of my best friends office space in her home! Here’s where i started! Is this how it’s going to end up? Maybe! But I’m sure I’ll tweak some things along the way!

So it’s an office space, right? And while I was researching all the different cabinet options, in order to get to exactly would fit the space, it was going to be…. Pricey. So the options were, get the stock cabs from Home Depot and have them fit the way they fit, or build my own.  So, of course, I did what every good DIYer would do and watched a bunch of YouTube videos on how to build cabinets. And now I’m about halfway done! Have you seen the latest REEL on the ‘gram? We are making progress! Stay tuned to see how it turns out!

Below you will find the mood board and links for the room!


Read More

Target Kitchen Essentials

Monday, May 17, 2021

No comments

 Target is having a sale on Kitchen essentials this week! I rounded up a few of my faves for

you to check out if you're in the market for kitchen things!


Thanks as always for shopping my links so I can get 14 cents when you shop! xoxo, Sharee


Read More

Hilton Carter drop at Target

Saturday, May 15, 2021

No comments


 Loooving this drop of faux plants, pots, vases, and more!! Linked a few of my faves here!


Iron Plant Tags • Preserved MossWhite Ceramic PlanterBrown PlanterGlass Plant Mister 

White Plant StandMetal Hanging Plant StandPlant in White BowlPhilodendron on Wood Stand 

Hanging String of HeartsMonstera on Wood StandRubber Tree 


*** Please Note, there are affiliate links on the above items and Sharee earns a small commission when you use them. She also thanks you when you do.***


Read More

How to achieve the perfect blend of Boho Farmhouse!

Wednesday, November 6, 2019

3 comments
I had someone send me a message the other day on INSTAGRAM asking about combining the two styles of boho and farmhouse. It seems all the rage right now in the decor world. And I gotta say, it's my JAM! I love mixing the two styles! Soooo for my last week of the ONE ROOM CHALLENGE and as I finally reveal all the nooks and crannies of our loft, I thought I would give you a few tips on how to achieve the perfect blend of Boho Farmhouse!

So lets get started!


TIP 1... First things first, you need to decide what it is you like about the boho and farmhouse styles.. For me, and for the purpose of this post, I have found that the easiest way to mix the two is to focus on the two major design elements of them... The industrial look of the metals and woods from farmhouse, and the textures, layers, and charm of Boho. Wooden tables with metal legs, metal curtain rods and wood shelves, etc!


TIP 2... For any room you are decorating, you're going to want to start with your large furniture items. For our loft, I wanted them to be items that we will love and enjoy for a long time. I LOVE this CABINET that I got from Amazon, and we already had this COUCH  from RC Willey. Then I loved this COFFEE TABLE from Amazon, but decided I wanted to make one instead of buy one. (That blog post and tutorial is coming SOON!!) All these items have that farmhouse feel, but the cabinet also has a little boho vibe because of the chevron design, color, and finish. Pay attention to the design of the items you choose. Try to find things that are unique to your taste, simple, and easily adaptable to both styles. 


TIP 3... One of the reasons I LOVE the cabinet I chose is because of the storage it has! We put all our games in it and are able to turn around and play on the coffee table I built. It warms my heart thinking ahead to all the fun we will have in here! I, also, had these old floor pillows from my parents house that I loved growing up and they were still in really good condition, so instead of going out and spending a bunch of money on new pillows, I recovered the ones we had.... (I am not a seamstress so I'm afraid there will not be a tutorial on recovering pillows... remember the instagram stories?! hahahah) But I wanted my kids to be able to grab a floor pillow and sit on it while we play games, or they could lay on them on the floor while we have family movie night! They also used them for building forts and I was not about to take that fun away from them. Ha! 

TIP 4... Another great way to mix Boho and Farmhouse is with your textiles! (Textiles refers to anything that is woven.. pillow covers, rugs, curtains, throw blankets, etc) Farmhouse patterns are stripes, buffalo check, solid colors with words, etc, while Boho patterns have more leather, fringe, tassels, and poms. I gathered a bunch of pillows from Homegoods, Woven Nook, and then I recovered some pillows I already had with the leftover fabric I had from the floor pillows. Boho-Farmhouse is more about having an overall cohesivness than matchy pillows, so try to feel free to gather a mix of textures and patterns with your pillows and throw blankets! 

When I found THESE CURTAINS from Amazon I fell in LOVE! They are solid, and white, and have a little lace down the sides and along the bottom. A perfect mix of Boho and Farmhouse!


TIP 5... Wall art! If you are doing wall paper, a large mural, or any type of big wall covering, try to choose something neutral that can serve as Boho or Farmhouse. THIS WALLPAPER from Home Depot was the exact wall covering I was looking for! I loved that it was neutral but still eye catching and I felt it would be perfect with the board and batten we installed. (See related links at the end of this post for wallpaper and Board and batten installation tips) Since this is where we hang a lot I wanted my family to feel like this really was their space! Adding a photo ledge shelf with family photos, was exactly what I was looking for to bring familiarity and comfort to the space. Plus I like that the shelf is wood (hello Farmhouse!) and has a low profile. I didn't want it to stick out too far from the wall! 

Some other really cute, and really boho things you can add to your wall is baskets and macrames! You can sometimes find cute baskets at your local thrift stores, OR find a vintage shop like THE SALTED OLIVE and buy some from there! And I LOVED the idea of a hanging plant macrame, so I asked THE WOVEN WILLOW to make me one! I LOOOVE how this little corner turned out! Let's just all cross our fingers that my kids don't start playing with that macrame. hahah!


TIP 6... Something I LOVE about Boho decor is how unique each space can be. Boho is more about your lifestyle, showcasing unique items, and letting things live where they fall. So, I thought about what we like to do in our loft and I designed around that. I knew before I started that I wanted it to be a retreat for my family. A place where we could watch movies and play games, read books or cozy up with hot chocolates, and even have epic dance parties if we want to! I also wanted the space to be stylish.. with design elements that will allow for LIVING.

My goal was that we would all feel at home and comfortable and I feel like I achieved that!!


Thank you SO MUCH for following along with my Loft project! It means so much to me that youa re here! Participating in the ONE ROOM CHALLENGE has been such a fun challenge!!! Am I going to do it again? PROBABLY! I have learned so much and could not have done it without YOU! Make sure you go check them out all the other participants, so inspiring!

Have a friend you think would like this post? Share it with them! Or repin on Pinterest!

And I will see ya over on good ol' IG!

Happy decorating my friends!

xo, Sharee


Bonus tip.... Use functional knick knacks like Mr llama here. He's holding all our checkers pieces. Llamas are totally boho, but he's also wood, leaning back into that farmhouse vibe! 


And lest we all forget, here are the BEFORE pictures of my loft! Just 6 weeks ago!!


Related Blog posts...
Everything you need to know for easy wallpaper installation
Best paint tips!
Paint prep for board and batten
Easiest way to install Board and batten
Read More

20 farmhouse things you NEED for Spring from Ikea!!

Wednesday, February 21, 2018

6 comments
Spring is just around the corner and I am getting that itch to give my house that fresh, renewed feel that comes every year after Winter... So I have been searching high and low for inexpensive, Spring-ey farmhouse pieces to add to my home decor this year, and guess where I found some AMAZING things?! IKEA!! Now if you're anything like me, when you go to Ikea and you have to plan to spend at least half the day there, partly because you get lost, and partly because it's a gigantic store and you just want to spend the whole day exploring and finding all the cute things. Well, the other day, I went searching, and Ikea did NOT disappoint!

Here are 18 farmhouse pieces you need for Spring from Ikea! And you don't even have to go and spend half your day searching because I have the online link for them too, you're welcome! 


First let's do all the white things! (Forgive the US dollar amounts if you're reading from another country.)


1. This white serving tray! It's only $8.99!! It's metal, and SO cute for making a display or serving up something yummy for spring.
2. This White pitcher. It's also metal! And comes in at $14.99. Perfect for displaying a fresh bouquet of flowers. You could even tie a ribbon or some burlap around it for some added texture. 

3. This white hanging planter! It's $9.99 per planter, and SO cute!!
4. This Small pitcher. It's the perfect little milk/cream pitcher. Or another place to display some flowers. And only $4.99!
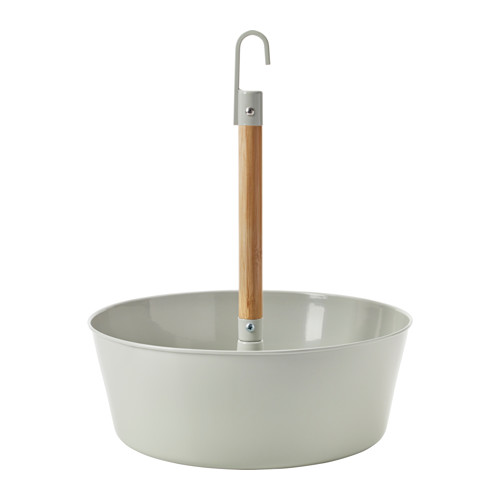
5. This white planter. It's metal with little wooden feet. SO cute! I will link some little plants later that  are PERFECT for displaying in it! Or you can go the real plant route if you have a green thumb! PS this planter is only $9.99.


 6. This white hanging planter. There is something about this cute little planter that reminds me of a doily. And doilies scream Spring and easter to me. I love the lace-like pattern around the top. And at only $5.99 a pop, you can get three and make a cute hanging garden.
7. This cute white greehouse! It's $29.99 and you can start all your herbs and veggies in it before you plant them outside! Or if you kill plants, like me, you can put some cute fake plants in it!


 8. This cute white planter. It's only $4.99 and it's perfect for either keeping craft supplies clutter free, or for planting your favorite spring flowers for your kitchen window.
 9. This white and wood bowl. Perfect for storing your yummy, fresh spring fruits and veggies. It's $12.99.
10. This mini bowl. It would be SO cute for individual little cakes or tarts. And it would be great for other holidays year round! And it's only $2.99 so you could get one for everyone in the fam!

11. This pie plate! ! It's only $6.99, and would be a perfect addition to your springy dinner table! You could put a yummy dessert, quiche, or even dress a yummy ham on it! 

12. This white lantern! Nothing says spring, like the sweet designs on this lantern. It would go perfectly on your front entry table! And it's only $12.99!


Now for the items that are not white! If you like farmhouse, you will LOVE these!

13. This metal planter! First of all, this is only $0.49!! Super cheap! And you can plant your favorite plants in it, or use it by your kitchen sink for the soap and scrubber storage! Really, when its only 50 cents, and it's a galvanized metal pot, you just have to buy it and find a spot for it! I got some fake plants to put in it. (Remember, real plant killer. haha)


14. This metal hanging planter rack! It's only $7.99 and I want to get it and hang it on my kids' playhouse in my backyard! Maybe I will even put real plants in it, and put them in charge of keeping them alive!
15. This grassy fake plant! It's only $5.99 and it's the perfect plant to put on your spring table! You could put this in any of the above planters! 


16. This fake plant! I LOVE the white tips of this! Adding greenery to any room, instantly brings the room to life! This one is $4.99, there is also a good selection of other fake plants at Ikea you can find them HERE.
FEJKA Artificial potted plant, thyme

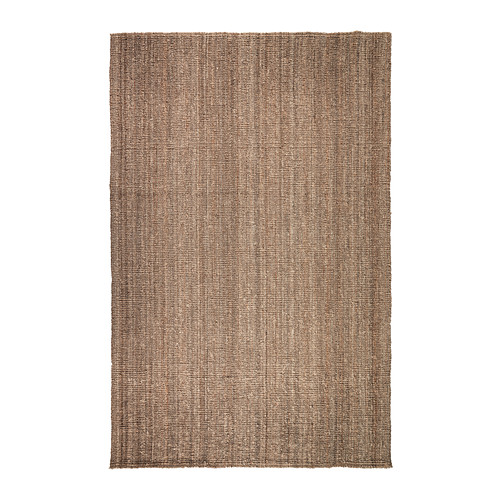
17. This jute rug! Bringing a natural-fibers rug will bring the outside in and liven up any room. I LOVE my Jute rug in my front entryway! It gave the room a breath of fresh air when we put it in there. This one is $139.
18. This wood bowl. It's $19.99, and I am a HUGE fan of bringing wood into a space. So many old vintage things are made from wood, so bringing in something wood will bring in the texture of that modern farmhouse!
19. This wooden stand! We already talked about bringing wood into a room, so we can all drool together over this wooden platter! And it's only $12.99!
20. This 3-tiered metal stand! You guys, this is only $19.99!! I found it down by checkout... The other day when I went, my budget was maxed out by the time I got to this.. but I guess that means I will just have to go back! 


Seriously IKEA is full of sooooo many farmhouse finds! These are just 20... Have you found items there that are perfect for the modern farmhouse?? Please comment below and let us know!

And remember sharing is caring!

Happy decorating!

xoxo


Read More

How to Flock your Christmas Tree...

Monday, December 4, 2017

No comments
I really wanted to have a flocked Christmas tree this year, but I wanted it to look like actual snow sitting on the branches of the tree instead of white all over.  Soooo I started searching for a way to do it myself! And today I am sharing that with YOU!

Below is the before and after of my tree!
Here are the supplies you will need...

1 Christmas tree
1 package of Tree Flock- this came in the mail faster than anticipated, like 5 days faster!
1 spray bottle
Water
A drop cloth/plastic
1 hand-held strainer (doesn't have to be that one, but similar)
Once you have all your supplies, put your drop cloth down, believe me, you'll want it... and get to work! Using your squirt bottle, filled with water, spray sections of your tree, lightly- shouldn't be soaked. As seen in this video...


After that, put some of the flock in the strainer and start shaking it all over the tree, WHILE YOU SPRAY IT, I started at the top. You can put as much or as little as you want on your tree! Watch this video to see the video my daughter took while I did ours.


After you are done flocking your tree to your hearts desire, do a little happy dance because you can now enjoy your beautiful flocked tree without having to pay A TON on money.  Seriously, I bought my tree, and flocked it for under half of what you can buy flocked tree. WIN!!
 Make sure you wait a day or two to start decorating your tree so that the flock can fully dry. Here is a close up of my flocked tree..... And a picture of my tree all decorated. 


Happy flocking! xoxo, Sharee

Read More

Make this wooden box for under $10! AND in less than an hour!

Wednesday, November 29, 2017

No comments
I have been wanting a wooden box by my kitchen sink to get rid of the clutter there for a while now, and yesterday, I couldn't take it anymore! I went out to my garage, found some scrap wood, and threw one together... And I thought I would take pics and share it with YOU! 


Here are step by step instructions on how to make this wood box, for under $10, and in less than an hour! Woot! 

Soooo, here it is... 
Supplies you will need:
  • Wood- I used 1"x6" wood planks, but you can use different sizes depending on the size of box you want. 
  • Chop Saw- You may be able to get your wood cut at your local home improvement store, like Home Depot, or Lowes if you don't have a saw. 
  • Brad Nailer with nails OR wood glue. Nails are faster, and easier, but glue works too. Careful if you decide to use glue though... If it gets on the wood, that wood won't stain the same as the rest of the plank. 
  • Sand Paper
  • Wood stain- I used Minwax Jacobean for this box. It's kind of my FAVE right now....
  • Gloves (Optional)
  • A bristle brush
  • Lint-free rag

Here is my scrap wood that I used. I measured the length that I wanted the box, and cut three pieces of wood to that length. Those are your sides and bottom of your box.
I then put the bottom, and two sides together. I held the wood in place and used my brad nailer to nail it together. Please be careful of your hand and foot placement when you use a nailer! If you choose to use glue, make sure it's WOOD GLUE! You will also need clamps if you use glue. The clamps will hold the wood in place while the glue dries. I don't have a picture of how this is done, but I like these clamps. You basically just glue, make sure it's in the right spot and then clamp to hold in place.
If you use nails, and they come out the bottom like this on the left.... Don't worry, you can clip the ends off with wire cutters as see on the right!
I forgot to take pics of doing the ends... SORRY! But all you have to do is measure the whole side of the end and cut a piece to fit.  Notice how in the picture below, the end pieces fit the whole side. Then you nail or glue the ends the same way that you did the sides.


After you have your box all put together, grab your hand paper, or hand sander if you have one, and sand it all over, inside and out. If you want a more distressed look, sand corners more than the rest so they look worn. This will help later when you sand to give a distressed look, after your stain is dry. 


OK, next! Stain! We are almost done! Phew! 

Get your gloves (optional, but highly recommended- if you're like me and get stain everywhere every time I do it), stain, bristle brush, and rag!

 Don't tell my son that I used his underwear as an old rag. Mmmmk... 
I wanted to stain my box, it was the only thing I could find. It works, right?! (hahaha) Moving on... 


 When I stain, I like to stain small sections and then wipe off those sections. 
I like to wipe off my stain right away so it's more surfacey. That way, when I sand it later it will still have a distressed look. Stain it alllll over, and if you even do the bottom, you'll have a multi-functional piece of decor- like if you want to use your box upside down somewhere else. I like to have multi-functional pieces of decor... Ha!


Your box should look something like this when you are done. 


Now is the hard part... waiting for the stain to dry. On your particular can of stain, it will tell you how long to wait, I typically wait over night which is what I did in this case. After your stain is dry, grab your sand paper again and sand those corners! If you have already sanded the corners to look worn this will go quickly. 


On the left you see my stained box, pre sanded, and on the right you see my box post-sanding, See the distresses look? That's my love lately.  :) 

And you're done!! Put the box wherever you want it, for me it was by my sink. Yay for less clutter!

By my sink...

I like to have my decor be functional as well as pretty, so I put hand soap, lotion, and some fake flowers in it. I can't be bothered with keeping more real flowers alive! I have children to worry about!

Enjoy! xoxo, Sharee

Read More

Barbie things!

  We are heading to the Barbie movie on Monday and we are all set with our outfits! I really wanted to be able to wear the things we got aga...

Copyright © Sharee Designs. Blog Design by SkyandStars.co